
 Korean
 Japanese
 Italian
 Spanish
Completed model desk system "Arttystation"
About a month ago, I posted a design article for my own model desk system.
In the above post, many members commented on praise and support, so we started the actual production with sincerity.
As it is said that theory and practice are different, design and production are very different, so I consulted with dozens of manufacturing companies for about a month and revised dozens of design drawings, so that I received the actual processed product.
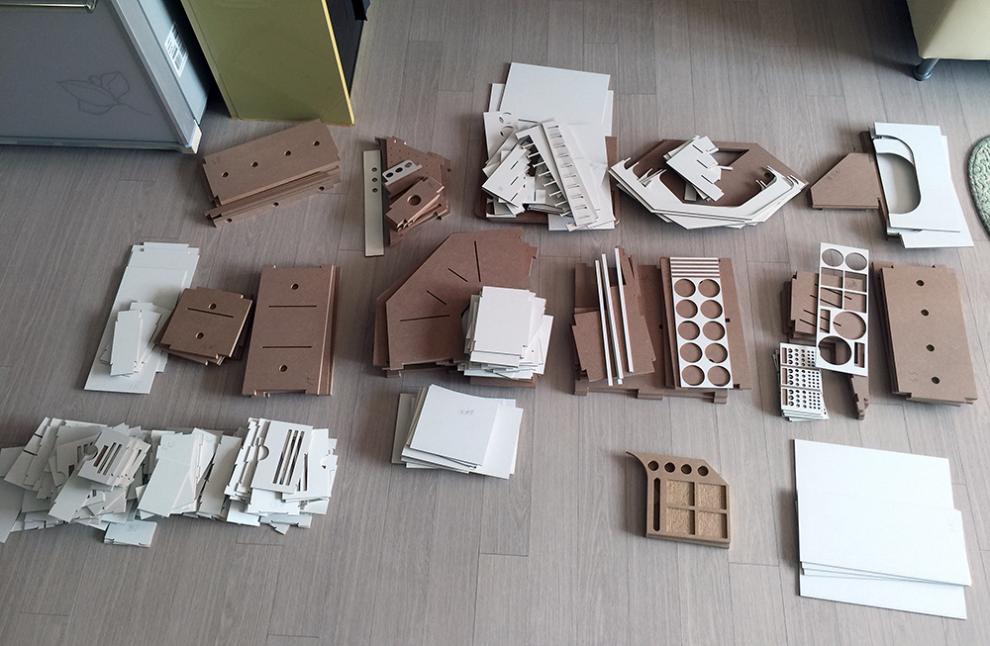
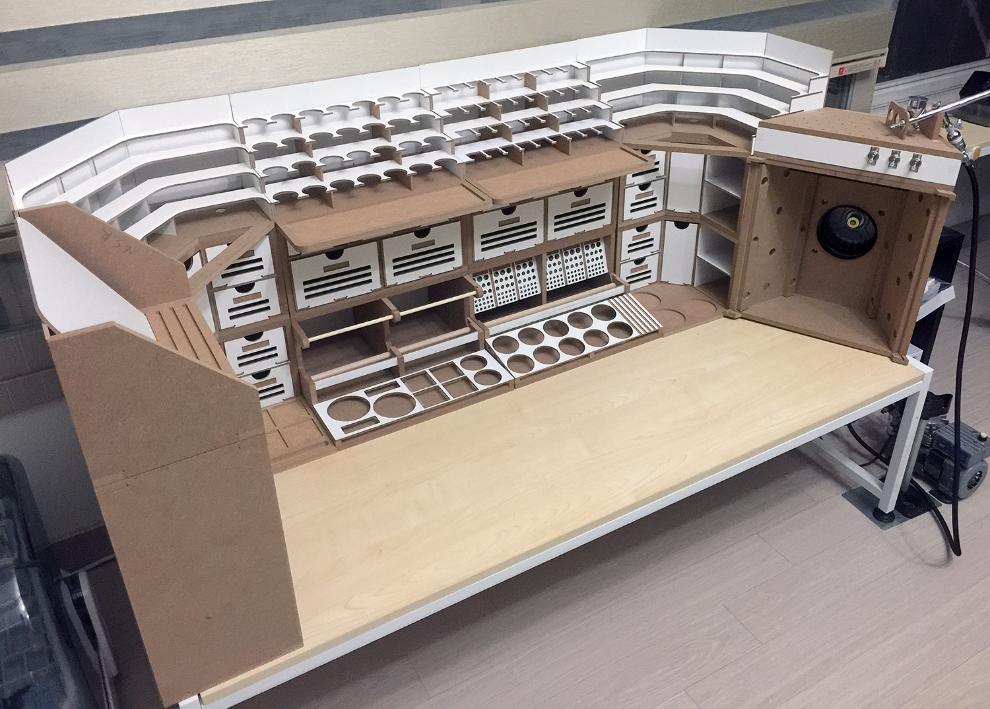
[The processed wood is sorted by part]
We started assembly over the weekend with the processed wood.
Since the drawings were almost memorized due to dozens of revising of design drawings, the assembly proceeded easily without much difficulty^^

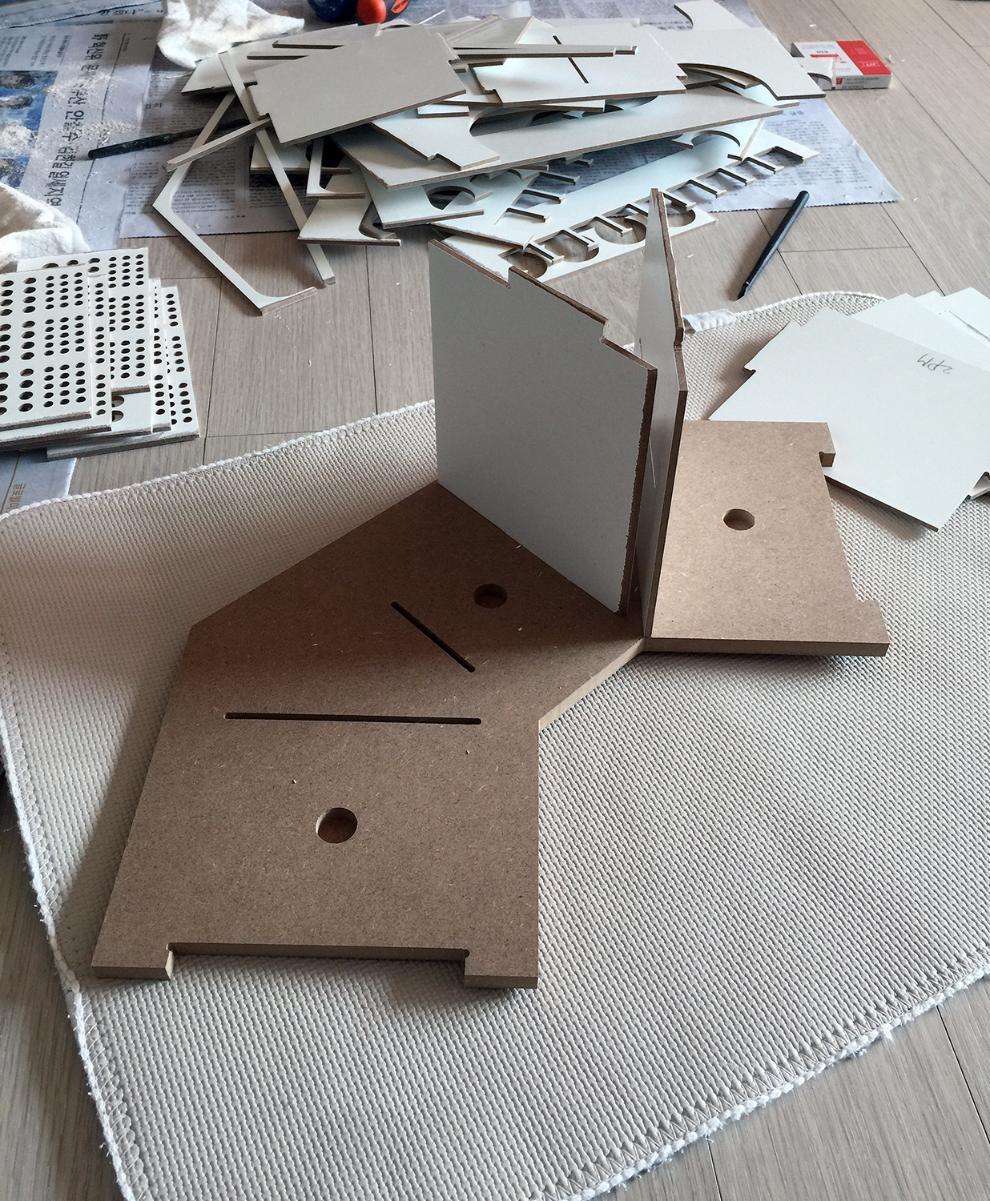
[The appearance of the product being assembled]
The assembly itself was easy, but after actually making it, I checked it with the actual implementation despite several revisions of the drawing, and there were some inconveniences. Through the process, I was finally able to make a finished product in about a month.
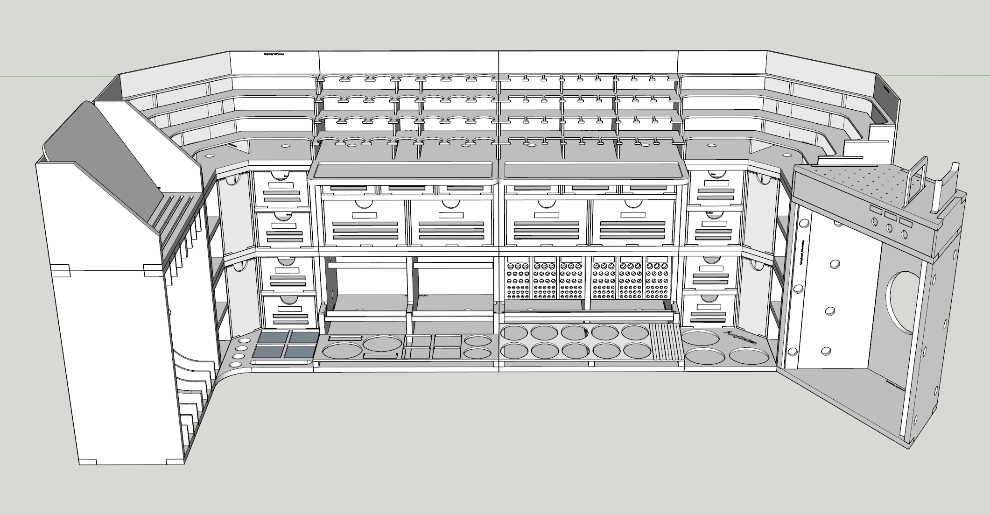

[Pictures from above "Design drawing" / "Finished product" / "After setting up"]
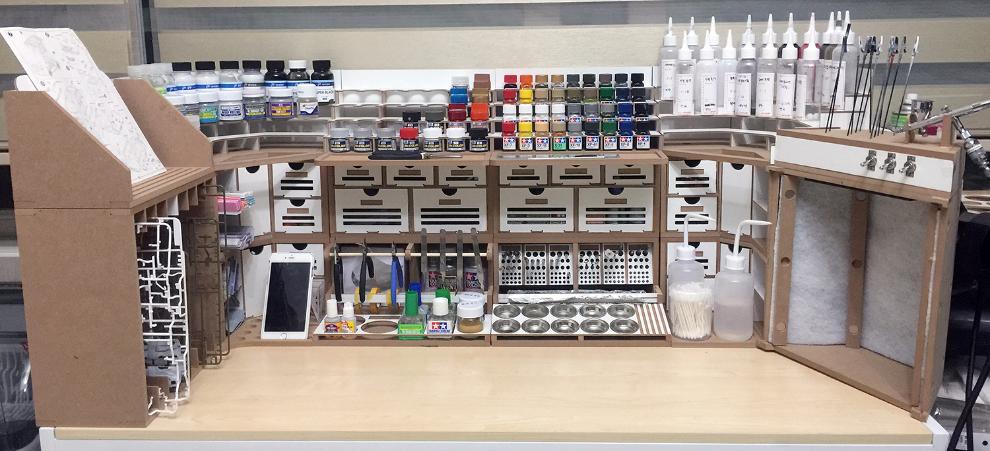
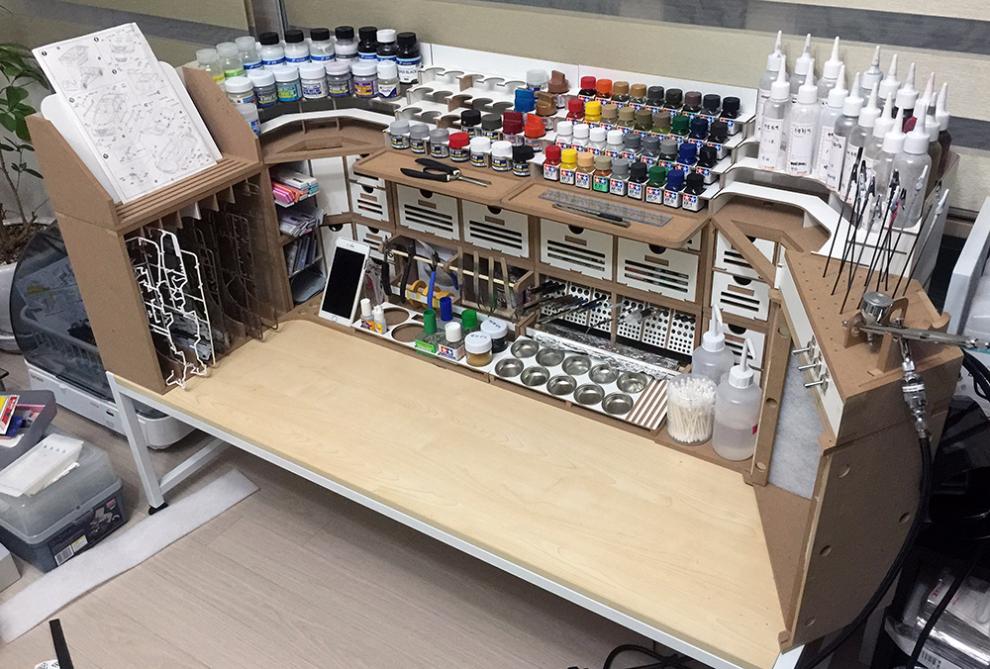
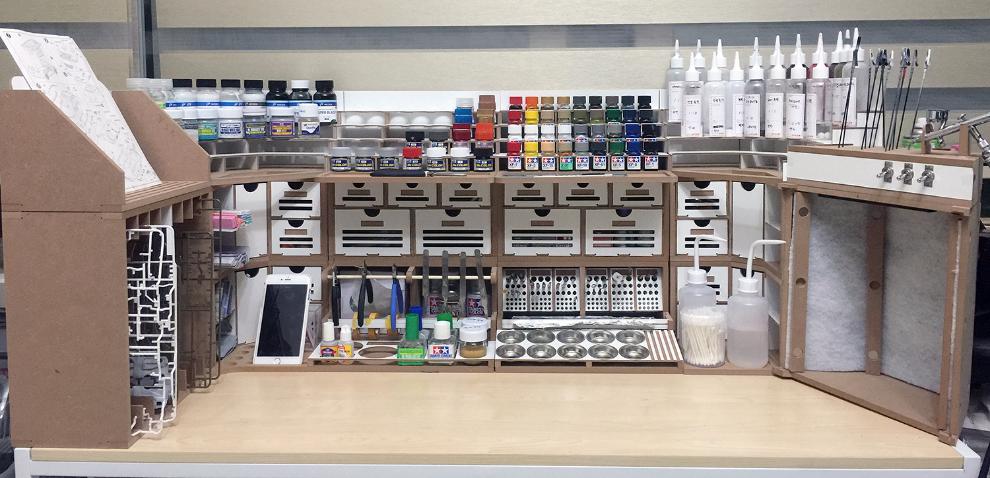
This is a picture of the product that has been produced.
It’s a little embarrassing to say with my mouth, but I’m really surprised to see it look more beautiful than the blueprint.
I was very satisfied with the fact that the "posture" when actually storing the supplies and using them came out so nicely and comfortably beyond my expectations.
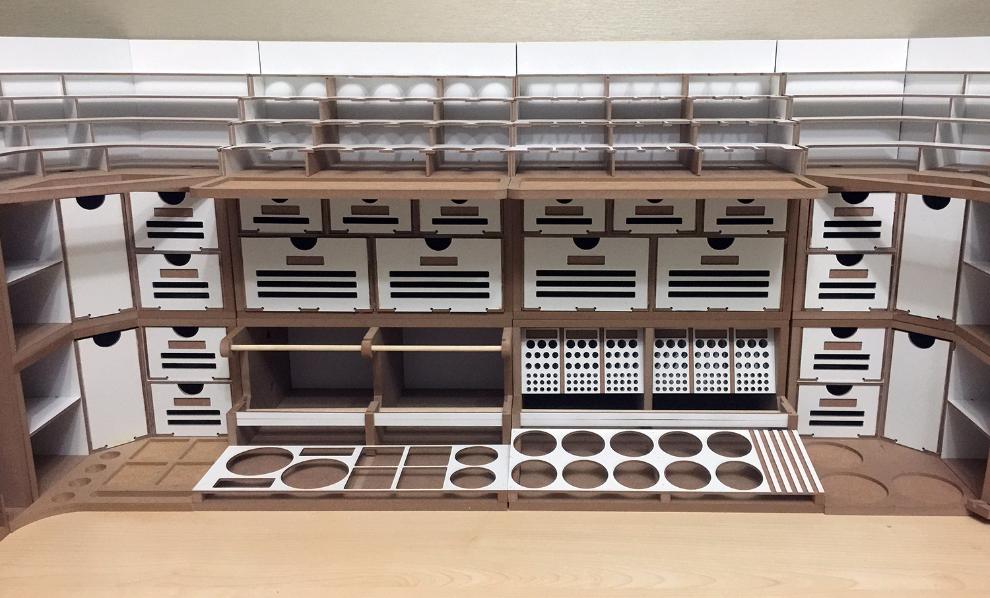
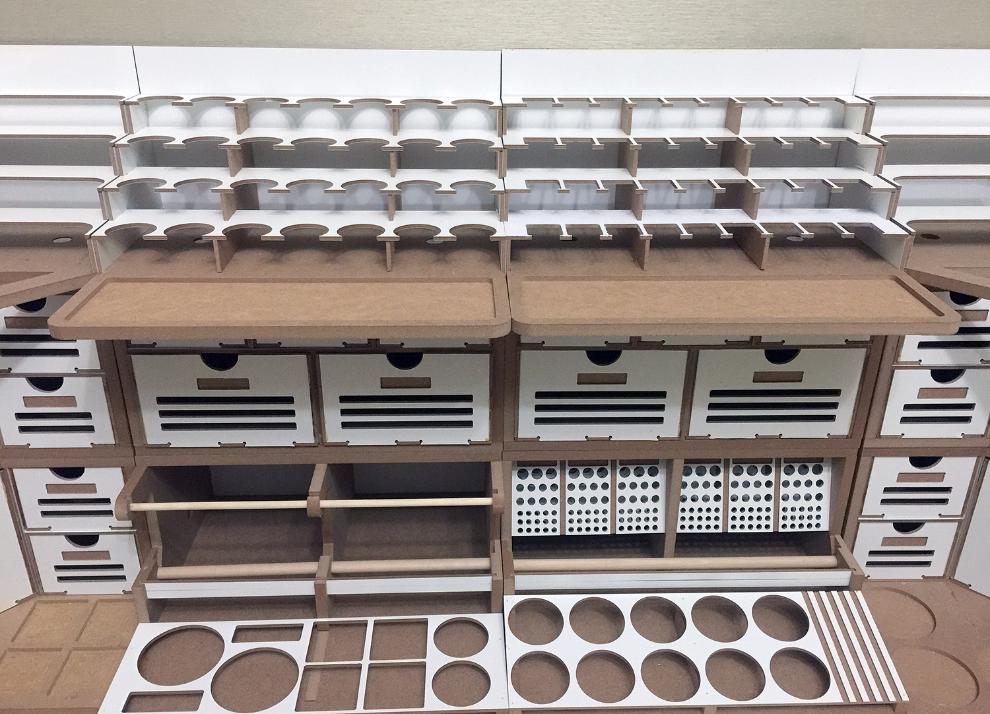
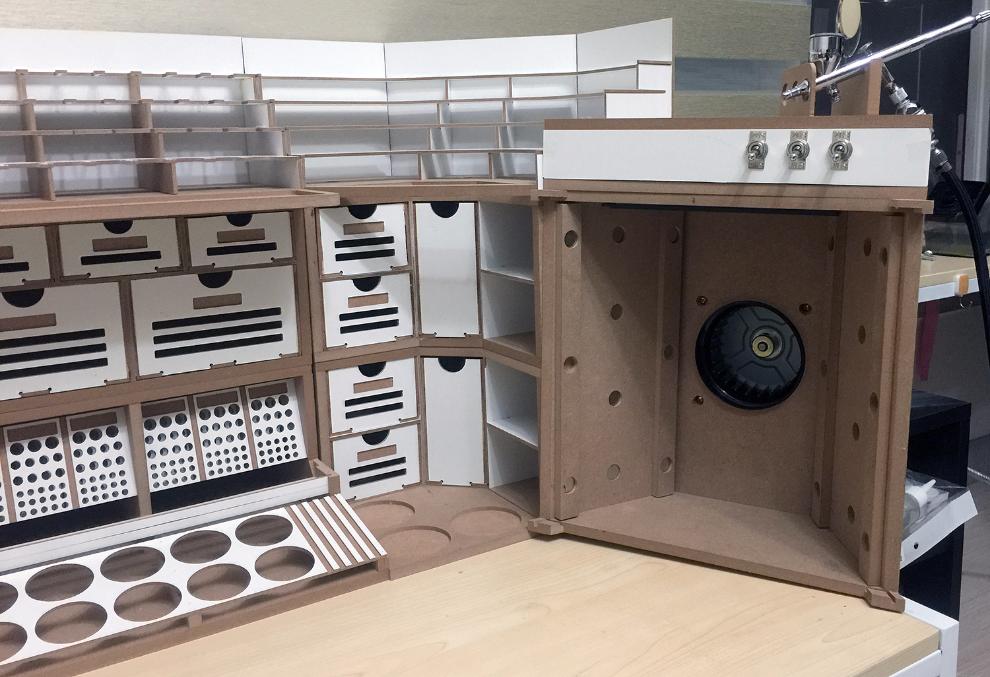
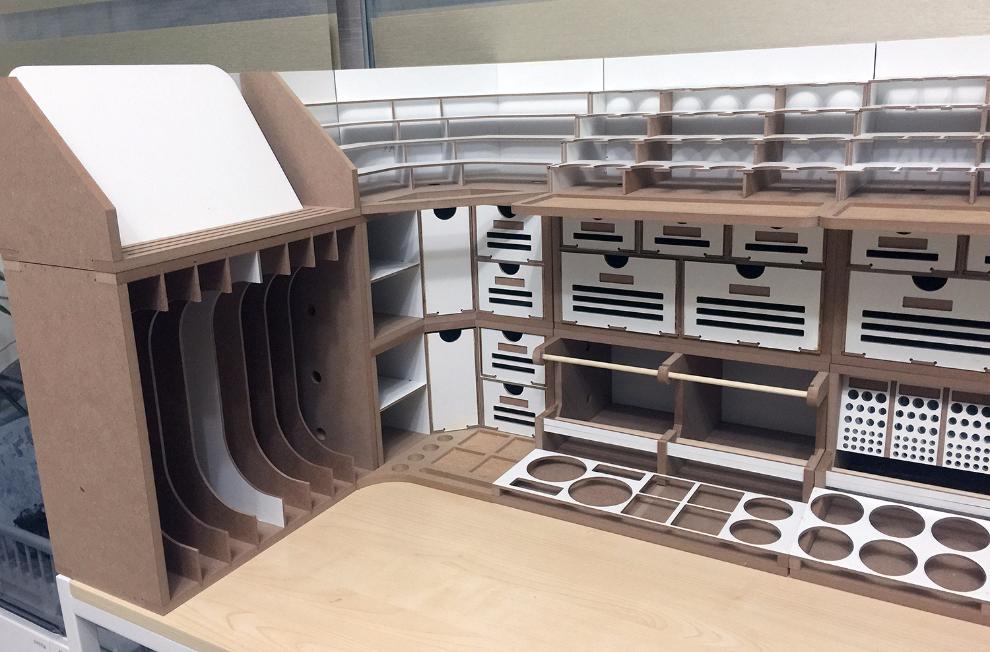
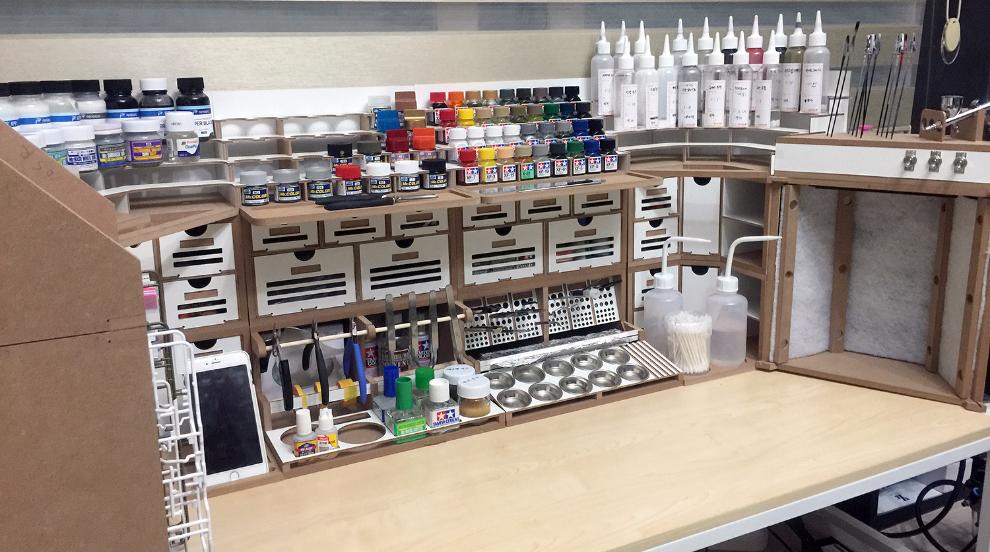
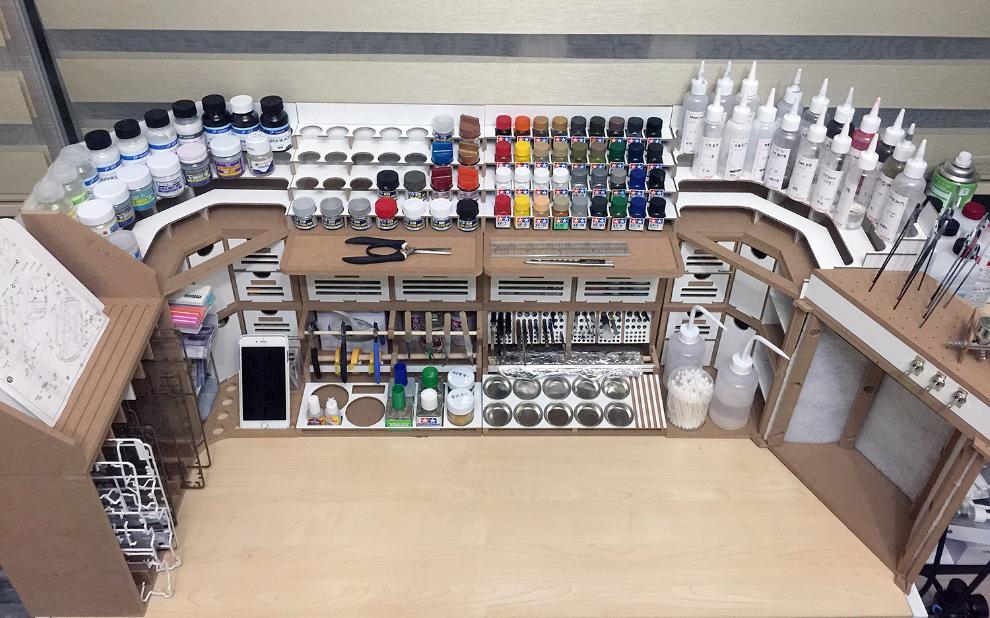
[Arttystation's central part photo]
The storage capacity of goods was realized to be able to store well by category without needlessly large or insufficient space, which is the result expected by applying drawers of various sizes, showing satisfactory storage capacity, and other functional parts were also considered. It has been implemented conveniently as well.
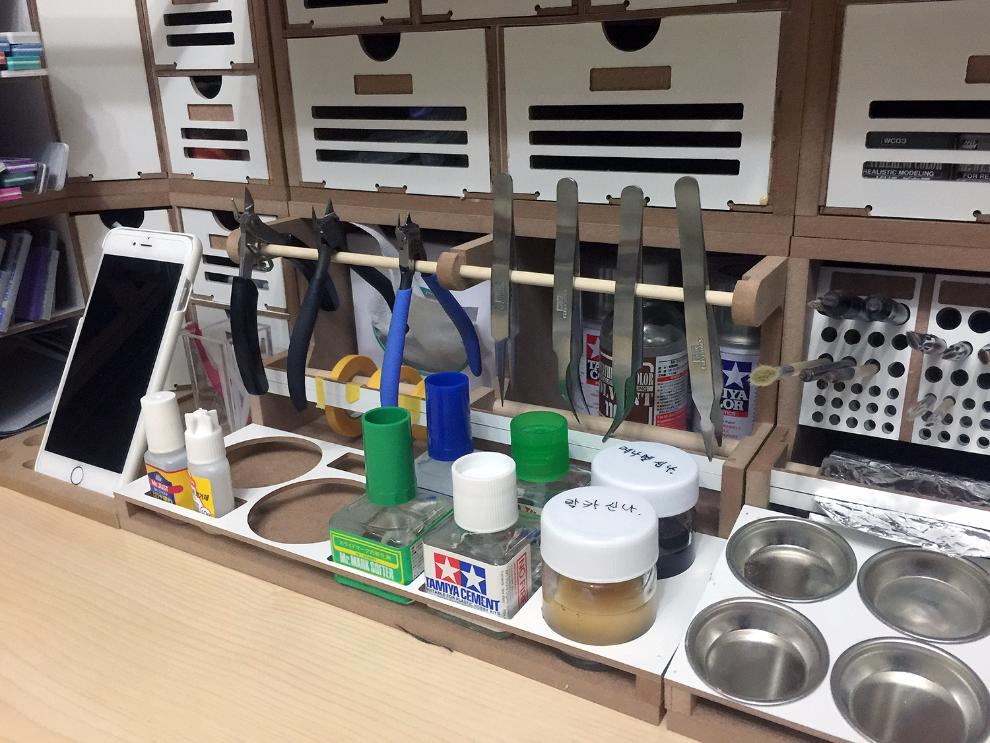
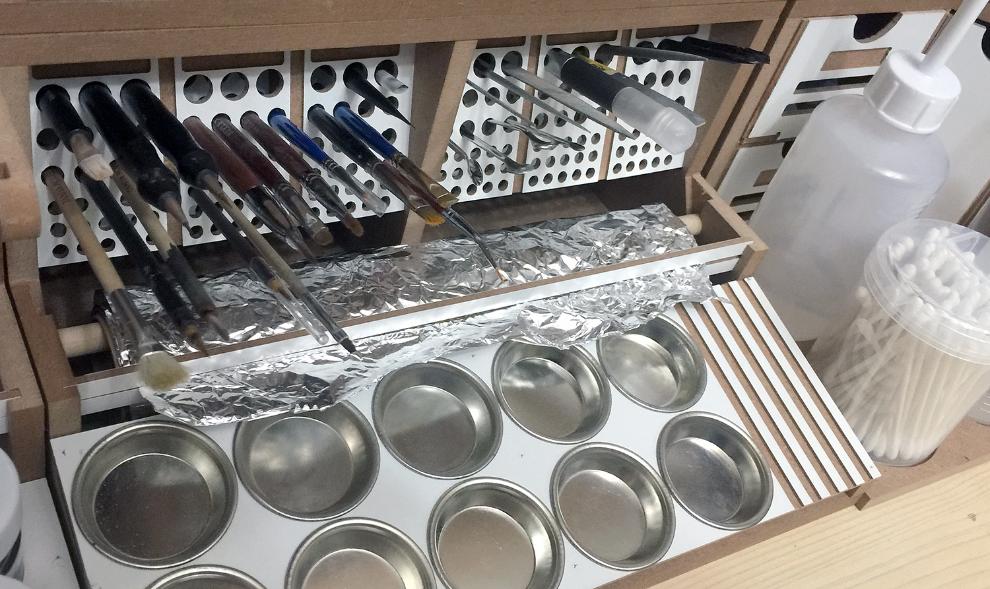
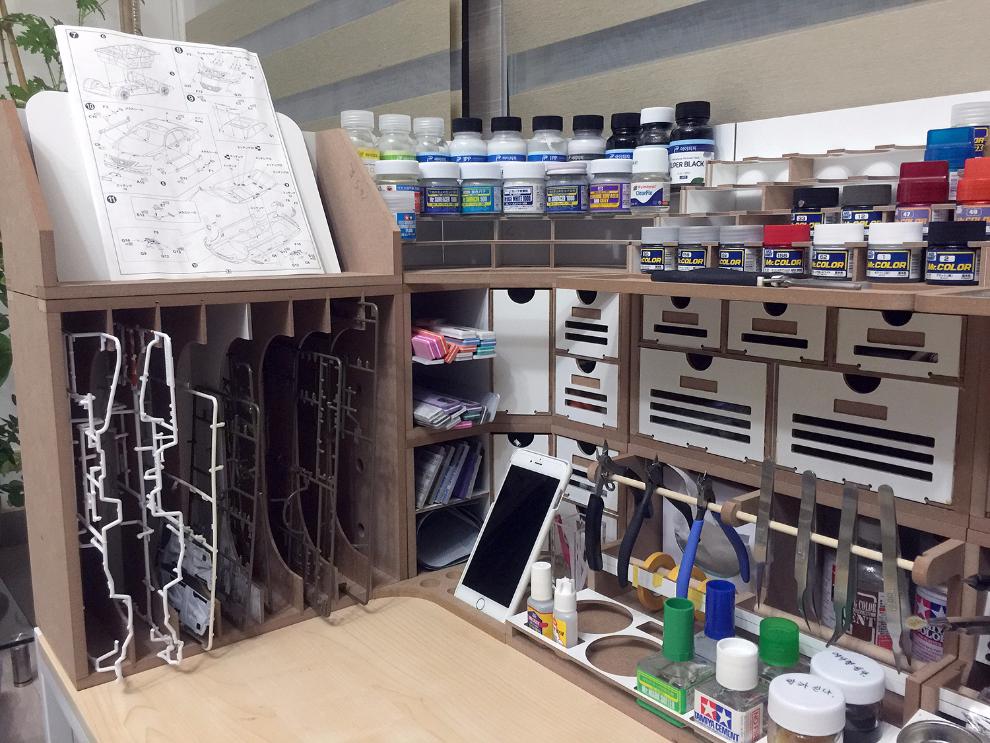
[Arttystation tweezers/nipper hanger photo]
Unlike the initial design, the tweezers and the nipper hanger were pulled out. Therefore, it is possible to use it without a part that is frequently used for mounting nippers and tweezers, and due to this, the empty space that had a hook inside it was used to store Yuhan-Kimberly Science square tissue, which is often used as a model tissue. In addition, the change was made to accommodate various cansprays, so it was much more convenient to use.
The storage space for various models in front of it was also well-made to fit the various items, and the cell phone holder was well mounted without falling over. The mobile phone in the picture is an iPhone6, so I think that large-sized mobile phones including Galaxy Note can be mounted without any problems.
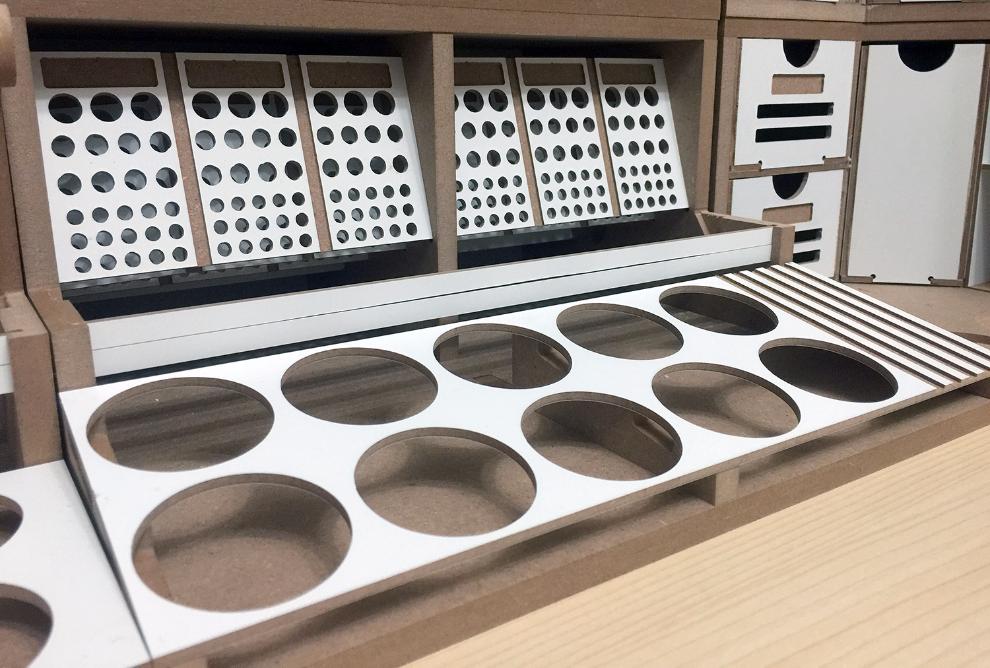
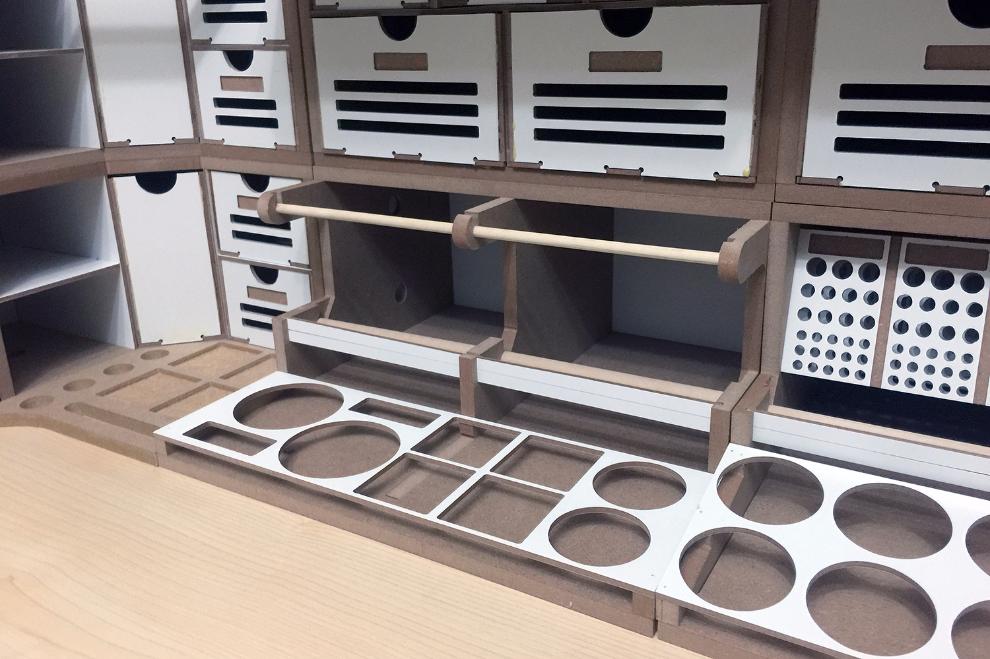
[Picture of iris and toning plate]
It is an iris and toning plate holder.
As I thought, Iris was much more comfortable to use than the conventional top-to-bottom method. The existing irises of the above methods were a bit uncomfortable to find because the items placed in the back were covered by the items in the front.
However, when I put the road, I felt the inconvenience of having to put it at an angle rather than putting it from top to bottom, but this was enough to bear if I got used to it.
And unlike the iris in the photo, the revised design has a different hole size.
When I put it in, there were few items to put in the smallest hole, and there were more things to put in the largest hole than I thought.
So, the number of small holes was reduced to one row, and the number of large and medium sized holes was increased.
The toning dish holder in front of it fits well as designed, so I felt very good when I tested it after completion.
The implementation of the easy cleaning method using the cooking foil, which was explained in the most detail in the previous blueprint post, worked well, but the cooking foil was not cut well with the wooden bar shown in the picture, so I transplanted the saw blade attached to the cooking foil box. I think it will be cut more conveniently.

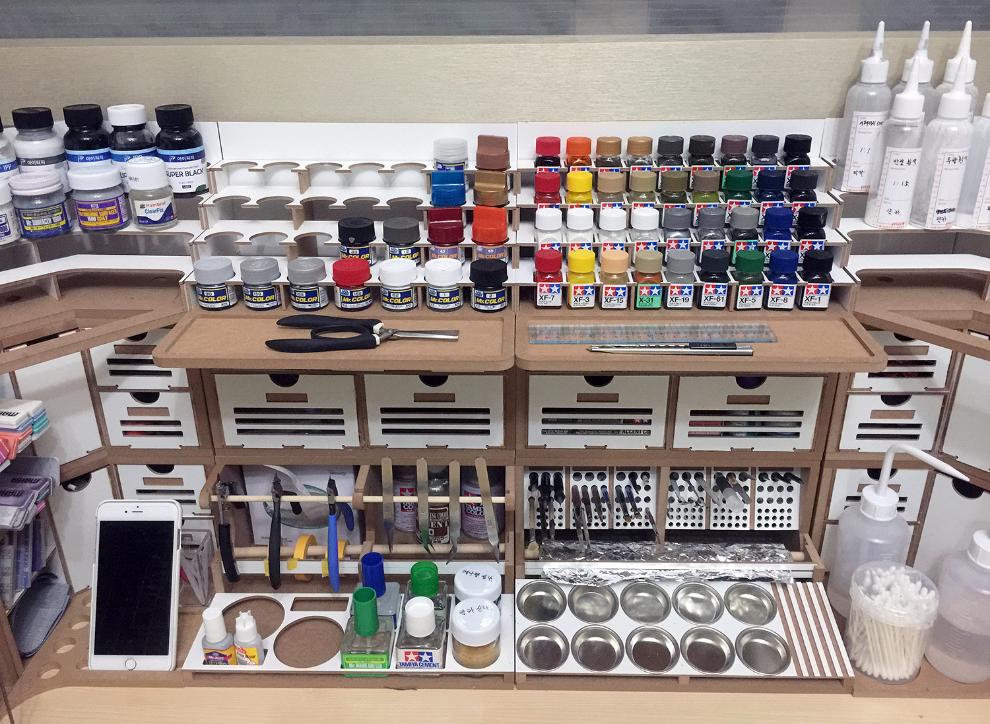
[Arttystation paint storage space]
Gunze lacquer and Tamiya enamel storage space also fits neatly without any errors.
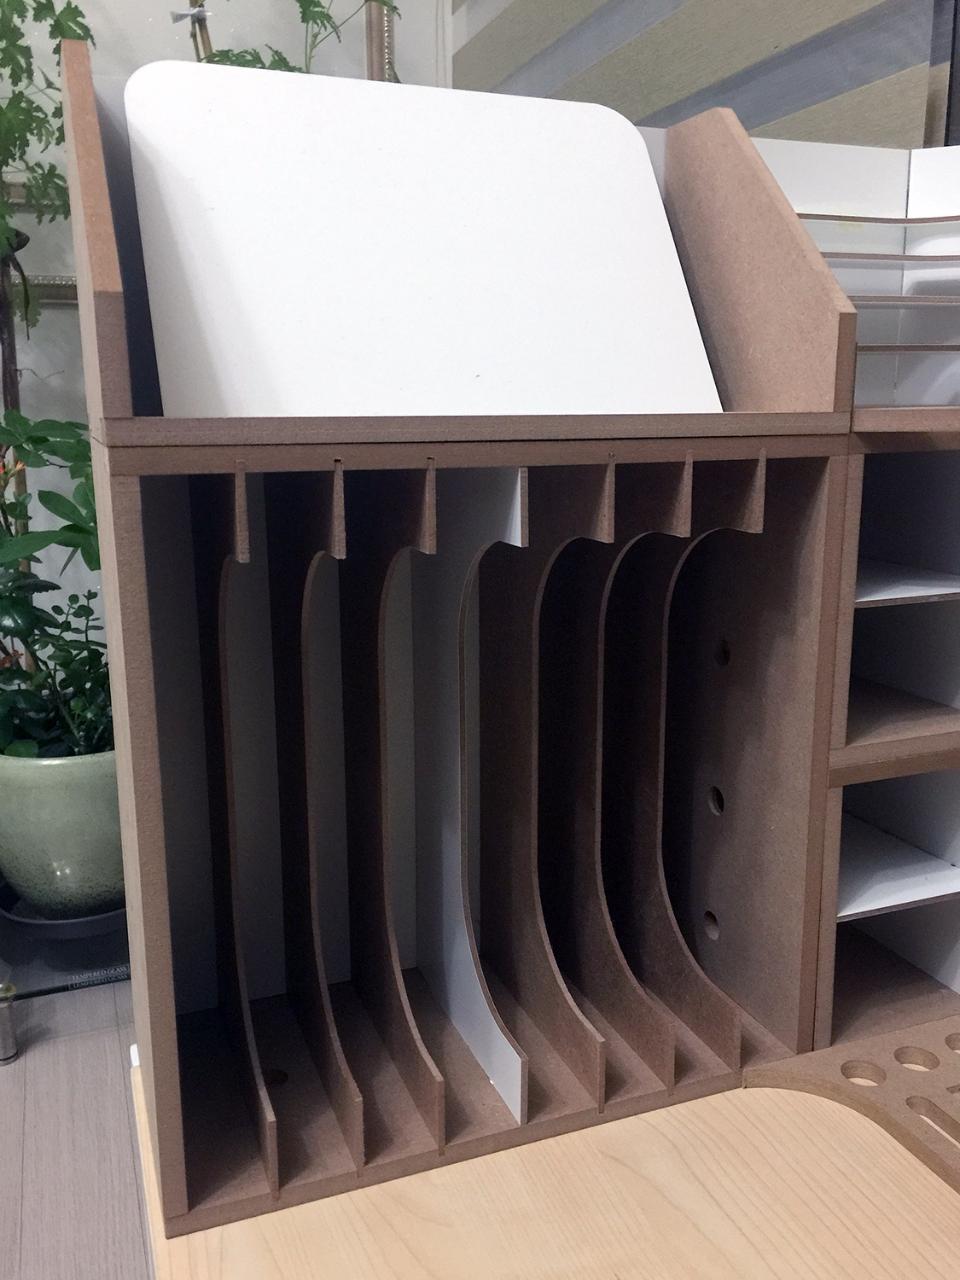
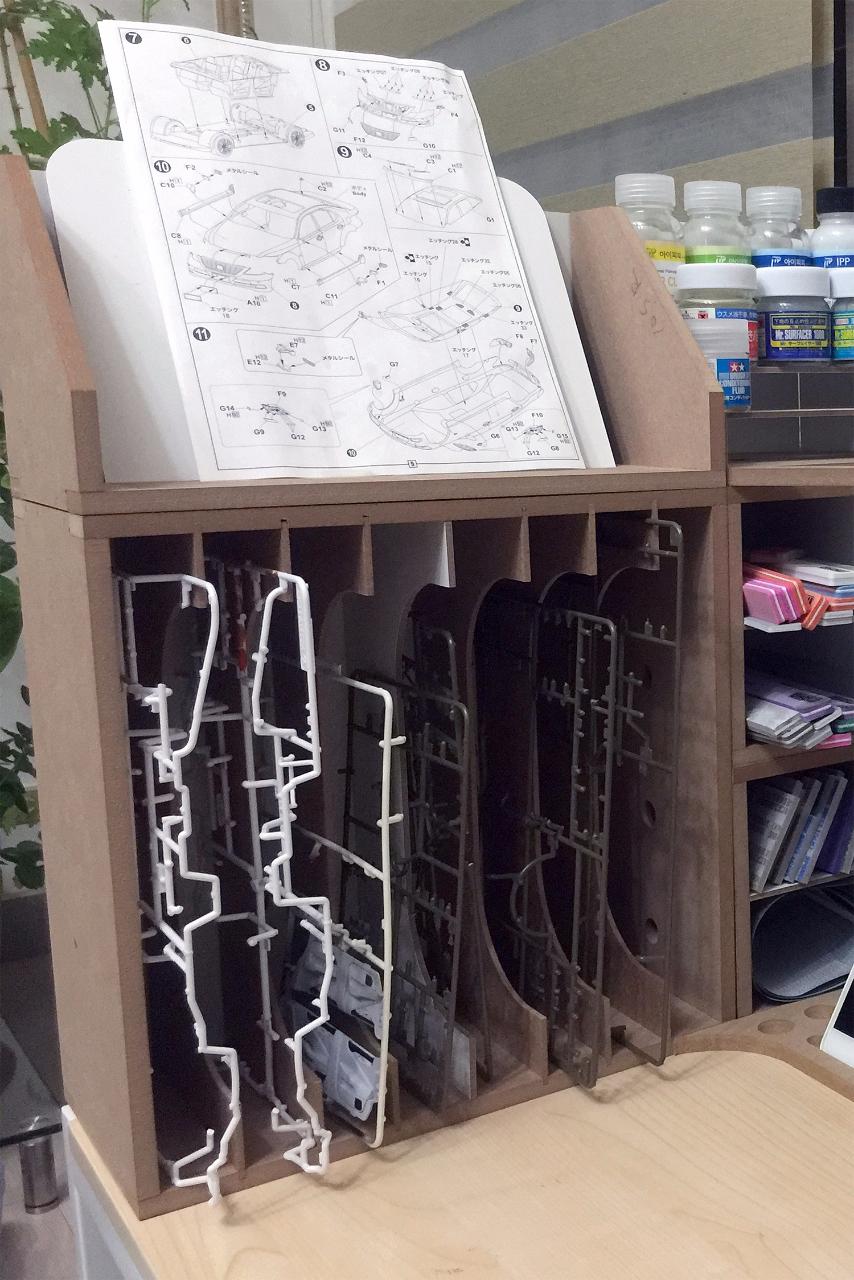
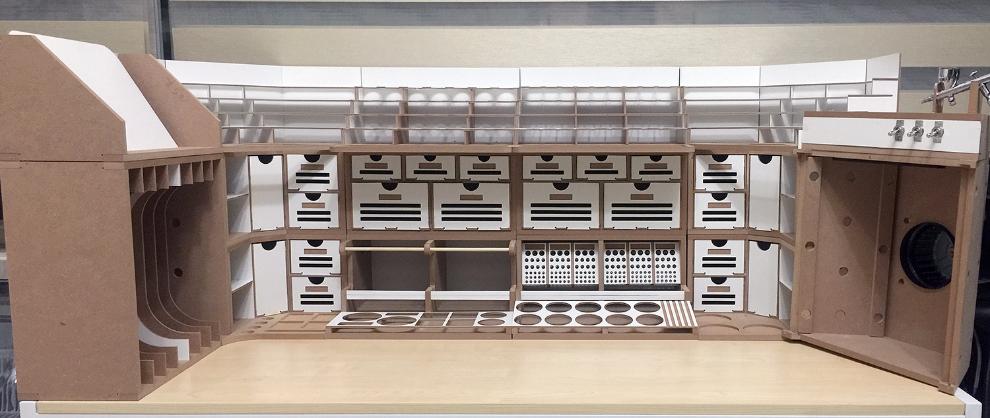
[Manual holder and runner stand]
Manual holder and runner stand.
As expected, I was satisfied with the installation as designed.
However, some runners with larger sizes are longer than the length, so you have to mount them horizontally. If you mount it horizontally, it will be well mounted (it will be impossible to work with this size desk for extra-large sizes that do not fit horizontally). If you mount it, it mounts well.
However, most of the runners are well stored vertically ^^ (out of the 5 kits I have now, only 2 runners had to be mounted horizontally)
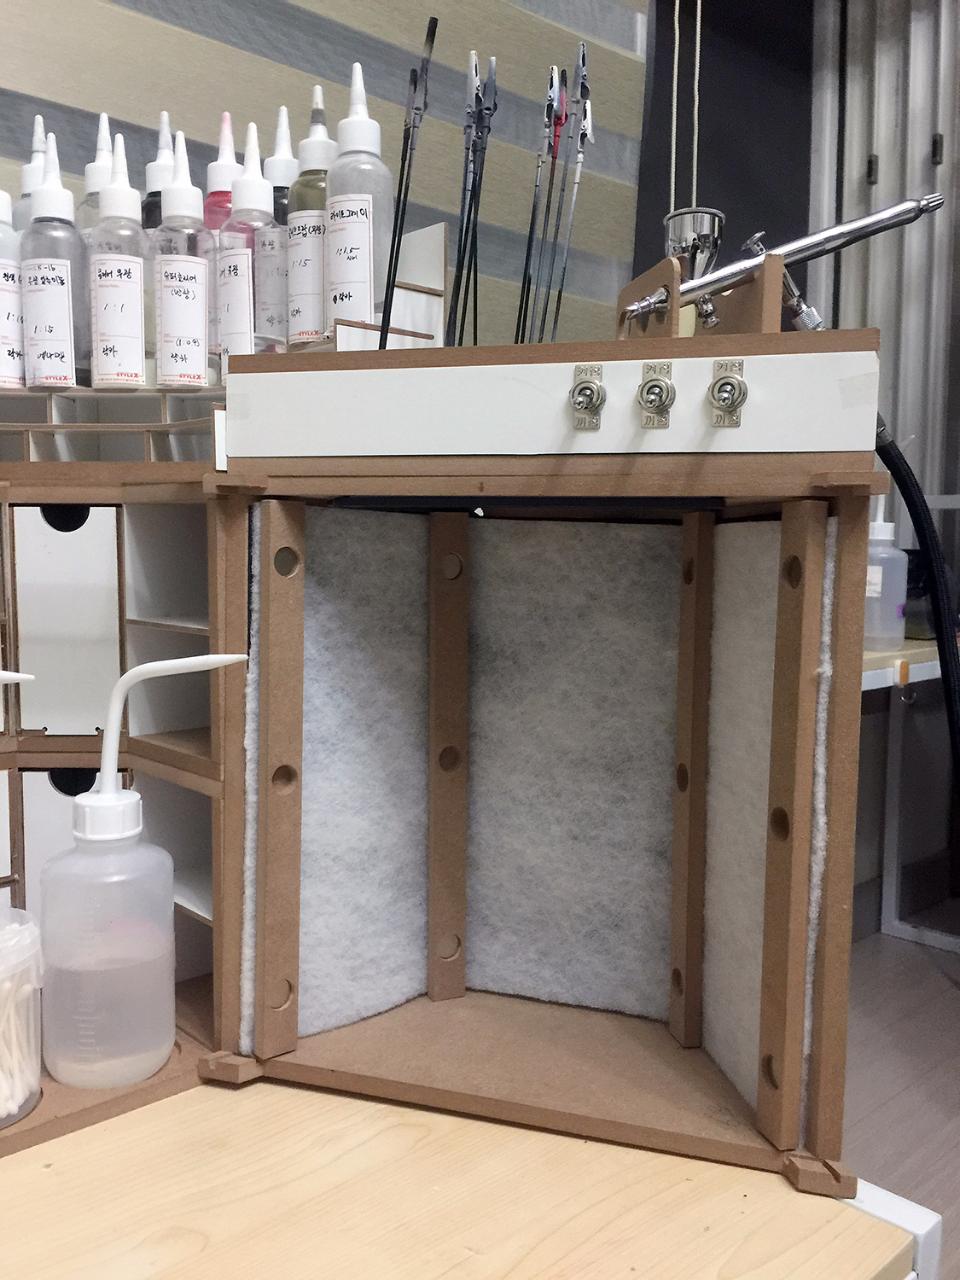
[Arttystation spray booth]
This is the long-awaited spray booth.
Innotek's TB-115 blower fan is designed to be installed by loosening the 3 screws in the fan and inserting it into the booth (top of the photo).
The filter covers the entire interior of the booth to reduce internal pollution, and it is well reflected as it was designed to be easily attached and detached using a magnetic strap (bottom of the photo).
The performance of the TB-115 fan is outstanding in terms of performance and quietness as it has been verified in many self-made spray booths. It is designed to intake air in the entire area behind the filter, not just around the intake port. (Good ^^ Glad)
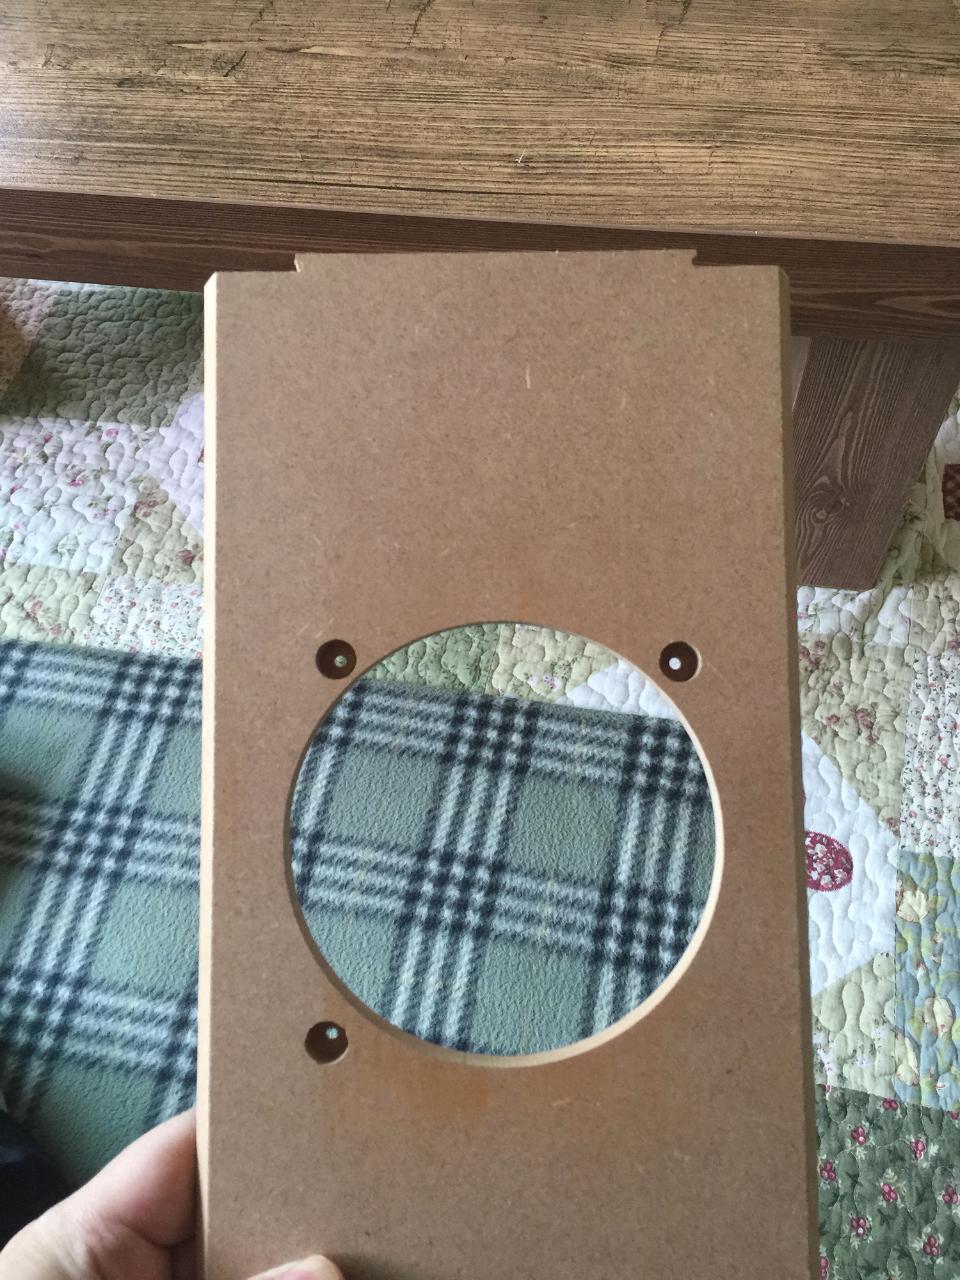
[Photo of screw hole on rear panel of spray booth]
This is the view of the back plate.
As shown in the picture above, it was made so that it can be easily assembled with a wooden board by loosening the screw attached to the blower fan.
(I remade this plate only 3 times ㅠㅠ The above photo was actually a failed and discarded version ㅎ)
Also, it does not apply to the photo booth,
In the modified booth, a transparent acrylic plate and magnet are used, and in the upper third, there is a plate that can catch the flow of paint that bounces off during airbrushing.
The lower 2/3 also has a transparent acrylic cover that can completely cover the front of the booth after work is completed.
Most of all, the spray booth used in the past took up space inefficiently enough to have a separate desk apart from its performance, but it was most convenient to have a posture that allows you to work and airbrush at one desk without any inconvenience. .
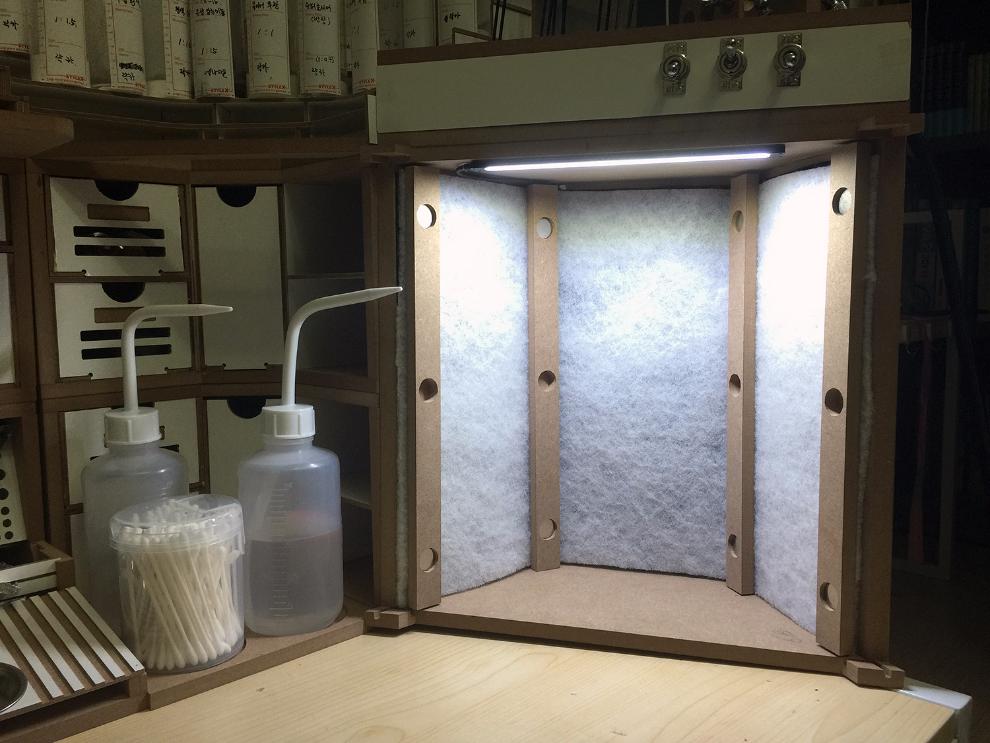
[Spray booth LED lighting test]
This is a test picture of the LED light attached to the top.
It gives out enough brightness so that there is no problem in working.
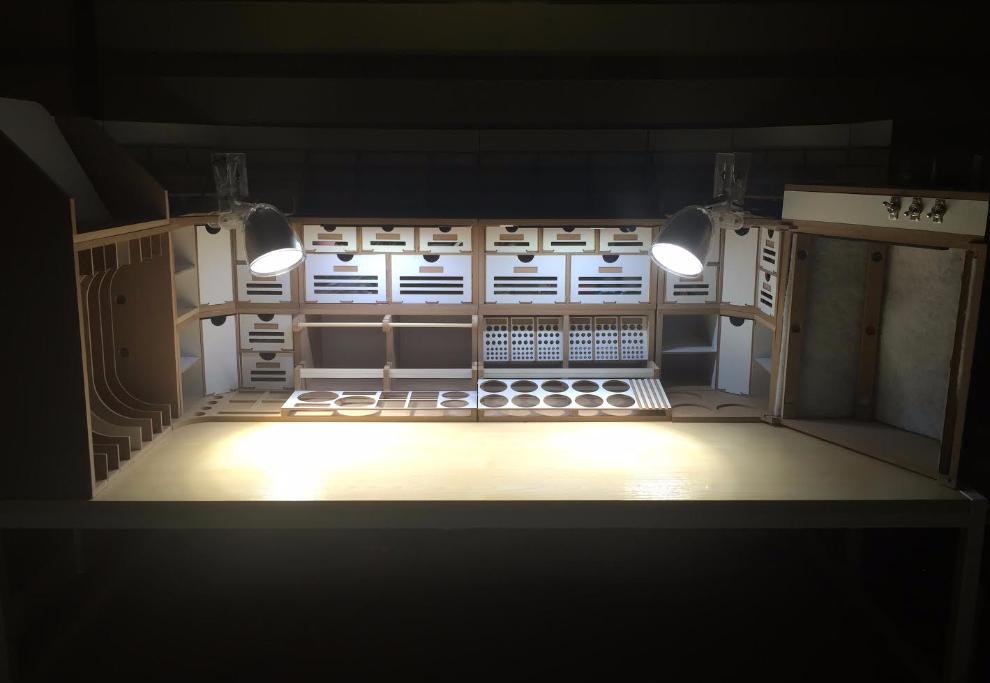
[Arttystation LED test]
This is a picture of the test with the LED stand attached.
After all, it gives enough brightness to work by turning off all interior lights.

It was a really fun and happy time for about two months to complete the first design drawing.
In fact, if you found a similar ready-made product overseas as the original intention, and made it yourself and used it yourself instead of purchasing the product, you would have used it with moderate satisfaction by just cutting, pasting, and cutting even if there are modifications or inconveniences.
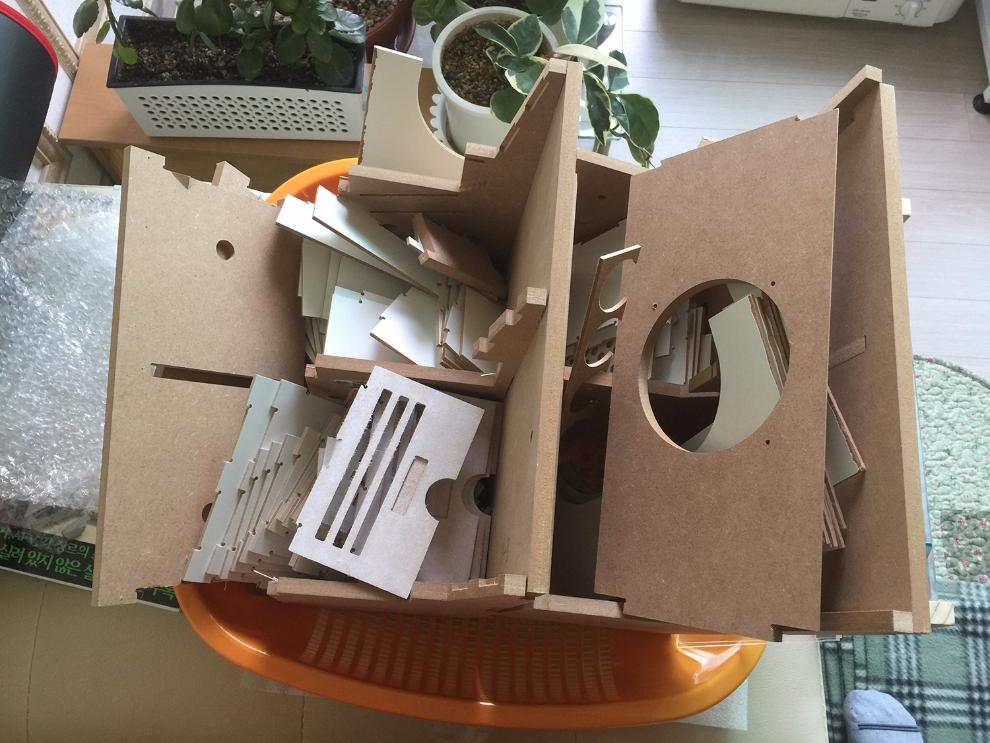
[Wood discarded due to modification and rework ㅠㅠ]
In the post that posted the previous blueprint, many members gave a lot of praise to them and actively expressed their willingness to order and use them together. With the mindset of'(I hate to be swearing more than that..... ㅠㅠ) It took quite a long time to get here to go through several reviews and rework.
As much as that, it seems that the result was satisfactory for myself, so I think it was a rewarding work that was not a waste of time and money.
And many members have been asking for joint purchase inquiries through personal messages and comments.
After the finished product came out, I carefully inquired about the joint purchase with the MMZ management team.
Thankfully, the executives willingly and actively decided to promote joint purchases .
(I take this opportunity to thank the MMZ management team once again)
The specific schedule will be announced later by the MMZ management team, but I think it will be decided around the end of this week and the process will begin.
For the joint purchase price, consult with dozens of wood processing companies and get a quote from a company that can deliver as much as possible based on quantity.
It seems that the price will be much lower than my initial estimate of the second half of the 200,000 won . (If you make this product and sell it on a regular basis, it will probably be difficult to set it below the middle of 300,000 won. As it is made to order, if you request individual production in the future, the cost will increase significantly.)
Also, as it is not just a price that can be easily purchased, credit card payment using safe transactions, etc. for the convenience of participating members is in consultation with the MMZ management staff, so it is probably not possible^^
Once again, I would like to finish the review with thanks to the many members and the MMZ management team for supporting and looking forward to reading the long article.
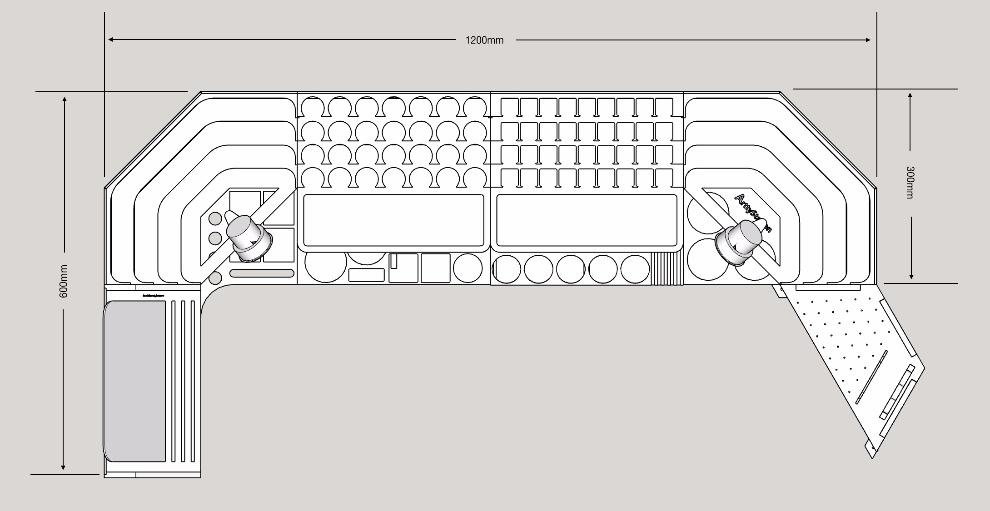
PS: Many people ask for the size and we will upload an additional dimension picture.
This post is a post posted on mmzone.co.kr, and the rights related to copyright reside on the site.
( http://mmzone.co.kr/mms_tool/mt_view.php?mms_db_name=mmz_review&no=34644 &mms_cat=[Others] )